


Gel Extensions
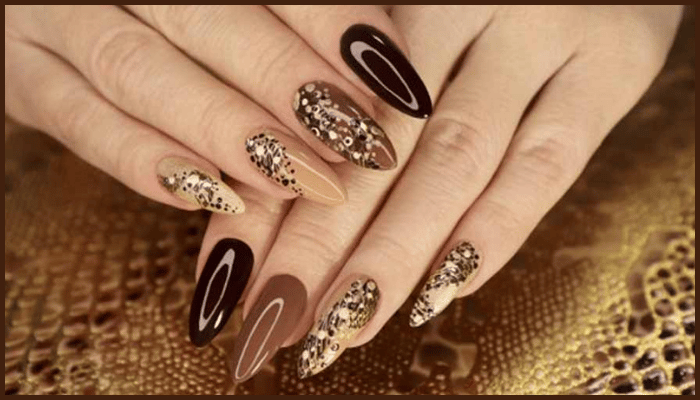
If you’re enamored with all the manicures and nail art you see on Pinterest and Instagram, you won’t be surprised to learn about the newest craze on the block: gel nails. Your hands have been taken over by the shiny look of the eyes and glossy lips. Make your own pair of gel nails and show off your new style for a night out on the town.
You’ll get some curious looks, and you’ll get bonus points if you’re the first person in your friend group to try them on. Your buddies will be clamoring for information on what they are and how to get their hands on them in no time. This article covers all you need to know about gel nails, including how to get started using them. It also includes guidance on how to maintain the look for several weeks, as well as recommendations on how to do so.
Gel nails differ from acrylic nails in that they are a lacquer that can last up to two weeks rather than an extension of your actual nails. Gel nail polish is applied in the same way as regular polish, but instead of drying, it is cured under UV/LED lamp. The end result is a manicure that is both shiny and chip-free! Gel nails are less likely to harm your natural nails. If you enjoy having a regular gel manicure, we recommend moisturizing your hands and nails in between applications.
Gel nail extensions, also known as gel overlays, are created by applying a thick layer of transparent gel to your natural or artificial nails. To set correctly, these require the use of LED or UV light exposure. They’re incredibly light and cause the least amount of discomfort. Gel nail extensions, unlike other nail procedures, have no odor. They don’t harm your natural nails; in fact, they protect them and help them grow. Gel nail extensions provide the impression of being more natural. Gel nails are not only comfortable to wear but also resistant to chipping due to their flexibility. They are not harmful to the environment.
How to do Gel Nails – Gel Nails Kit
If you get your manicure done at a salon, the components are already included in the purchase of the gel nails. If you want to create your own nail salon and provide services to your clients, or if you want a complete kit for your gel nails at home, the following materials may be required.
1. One Step gel 2. Natural Pink Gel 3. Cover Pink Gel 4. White Gel 5. Fiber Gel 6. Removing Lotion 7. Gel Cleanser 8. Primer 9. Dehydrator 10. UV/LED Top Coat 11. 11 in 1 Nail Care Treatment 12. LED Lamp 13. Pro Gel Brush 14. Natural Extension Tips 15. French Extension Tips 16. Transparent Extension Tips 17. Normal Buffer 18. Natural Nail Buffer 19. Smooth Buffer 20. Shining Buffer 21. Pusher 22. Trimmer 23. Nipper 24. Tip Cutter 25. Nail Glue 26. Cuticle Remover 27. Dry Flowers 28. Glitter 29. Mylar 30. Foil Paper Set 31. Dusting Brush 32. Lint Free Wipes 33. Removing Clips
These instructions will guide you through the process of perfecting your gel nails. It doesn’t matter if you get it done in a salon or do it all yourself at home.
1.) It’s crucial to start with clean hands before preparing your hands. Excess oils are removed by washing your hands. To remove all moisture, dab them on a nice, absorbent towel. You can also clean your hands with a hand sanitizer.
2.) Next, apply Glam Cuticle Remover on your cuticles and nail beds (and this product will be left to soak in for a minute). The dead cuticle tissue will loosen and melt as a result of this.
3.) After that, use a Glam Cuticle Pusher to gather all the dead tissue and clean the nail surface with a lint-free nail wipe to remove any remaining tissue. The Glam cuticle cutter (nipper) follows next, clipping away all the excess tissue.
4.) Measure the length of natural or transparent tips.
5). Use Glam Shining Buffer to remove the shine from the natural nail bed.
6.) Finally, use the Glam Dehydrator to eliminate excess moisture from the nail bed while also acting as an anti-fungal agent.
7.) Apply Glam nail adhesive to the nails, then cut and shape them with Glam Natural Buffer to achieve the desired look (round, square, semi square).
8.) Using Glam Buffer, buff the entire nail (artificial nails)
9.) Use the GLAM dusting brush to remove the dust.
10.) Apply the Glam primer to the entire nail, avoiding the cuticle.
11.) Apply the first coat of the GLAM one-step clear gel with a gel brush in a very thin layer. Clean the cuticles and side walls with a toothpick, then dry in the UV lamp for 2 minutes or the LED lamp for 60 seconds.
12.) Dry in UV lamp for 2 minutes or LED lamp for 90 seconds after applying the second coat of clear gel thick layer and cleaning the cuticles and sidewalls.
13.) Dry in UV lamp for 2 minutes or LED lamp for 60 seconds after applying the third coat of clear gel medium layer and cleaning the cuticles and sidewalls.
14.) Using lint-free wipes, clean the nails with GLAM gel cleanser.
15.) Use a Glam emery board to level the surface.
16.) Use a Glam smooth buffer to smooth off the surface of your nails.
17.) Use a dusting brush to remove the dust.
18.) Use a UV lamp for 2 minutes or an LED lamp for 60 seconds to dry the GLAM gel top coat.
19.) Apply GLAM 11 in 1 Nail Care Treatment on your cuticle area and carefully massage it in.
Things to Consider Before Fixing Your Next Nail Appointment All of this talk about nail extensions must have stirred your interest enough to call your local nail salon.
However, before you grab for your phone, there are a few things to consider:
1.) When choosing a salon, don’t be cheap with your money. A well-established salon will provide a well- trained team with years of experience. You can also rest assured that they adhere to hygiene standards.
2.) You may be tempted to prepare your nails before your appointment, but I recommend that you leave it to the manicurist. Natural nails of various shapes and styles may be required for various nail extensions. As a result, leave it to the experts.
3.) Plan on spending at least 1-2 hours on your nails. Remember that a rushed manicure is a terrible manicure, so take your time.
4.) Having multiple nail appointments in a row is a big no-no. Allow some time for your nails to heal after each treatment.
5.) Now that you’re aware that nail extensions come in a variety of styles, you should have a good notion of what you desire. Consult with the consultant about your goals, and they will help you achieve them.
6.) You should be confident enough in yourself to devote a significant amount of time and effort to maintaining your natural nails.
7.) Pregnant women should avoid any nail treatments.
If you’re pretty confident about your DIY skills, then we would suggest that you invest in a Gel Extension Kit which is available at https://www.glamnails.in/. GLAM is a Nail Shop in Mumbai. The Glam Gel Extension Kit can be used in the salon as well as at home. This kit is perfect for beginner nail artists, pros, salon experts, and technicians who want to switch to nail extensions or learn how to apply them. It’s also one of the specialized kits, with high-end professional materials such as gel systems, brushes, machines, and gel extension tools. GLAM is the hub of Wholesale nail salon supplies where you can get best nail products in wholesale rates. For gel extension fans who wish to increase the beauty and vitality of their nails for any occasion, our Gel Extension Kit is also suggested. Your nails, in our opinion, are an extension of your body and should be treated as such. We think of them as a glam embellishment or a means to boost a look’s dramatic flare.