


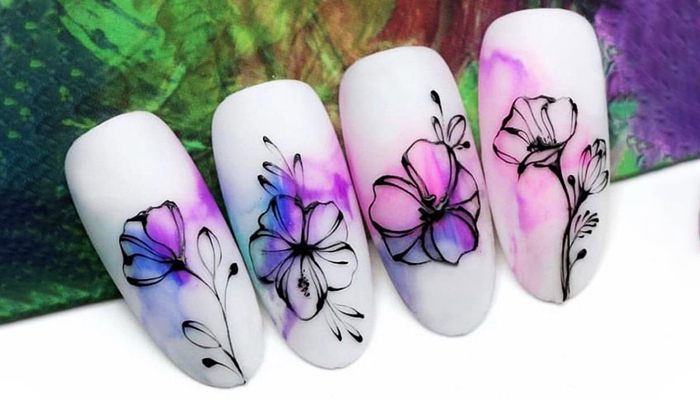
Gel nails have become increasingly popular in recent years, thanks to their long-lasting, chip- resistant nature and glossy finish. While getting gel nails done at a salon can be expensive, many people are turning to DIY gel nail kits to achieve salon-quality results from the comfort of their own homes. If you’re new to the world of DIY gel nails, this guide is for you. We’ll explore the basics of gel nails and introduce you to the top 5 styles that are perfect for beginners.
What Are Gel Nails?
Before we dive into the different styles, let’s start with the basics. Gel nails are a type of artificial nail enhancement that involves applying layers of gel polish to your natural nails and then curing them under a UV or LED lamp. The result is a durable and glossy manicure that can last up to three weeks without chipping.
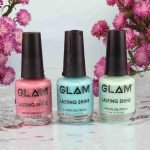
Grab Glam Gel Nail Art Kit
Invest in a quality gel nail kit, such as the Glam Gel Nail Art Kit, which includes gel polish, a UV or LED lamp, base coat, top coat, and other necessary accessories. This kit is perfect for beginners and ensures you have all the essentials to get started on your DIY gel nail journey.
Materials Needed:
- Glam Gel Polishes
- Glam UV or LED lamp
- Glam Base coat and top coat
- Glam Professional Nail Brushes
- Glam Nail Buffers
- Glam Gel cleanser
Here are step-by-step instructions for creating the five nail styles using Glam Nail Products:
1. French Rainbow Nail Art

Steps:
- Start by preparing your nails. File and shape them to your desired length and shape. Gently buff the surface of your nails for better adhesion.
- Apply a thin layer of the base coat from the Glam Nail Gel Polish and cure it under the UV or LED lamp.
- Apply the first color of the rainbow gel polish to the tips of your nails, creating the classic French tip. Make sure it’s a thin and even layer. Cure under the lamp.
- Repeat step 3 with each color of the rainbow, creating a gradient effect on your nails. Cure each layer under the lamp before moving on to the next color.
- Finish with a thin layer of the top coat from the Glam Nail Gel Polish Kit. Cure it under the lamp for the final time.
- Use a nail cleanser to remove any sticky residue left on your nails after curing.
2. White-Based Orange Fruit Nail Art

Steps:
- Prepare your nails as in step 1 of the previous tutorial.
- Apply a thin layer of the white gel polish as the base color and cure it under the UV or LED lamp.
- Apply a second coat of white gel polish for full coverage and cure it again.
- Apply the orange gel polish with the help of nail art brush to the nails where you want to place the fruit design. Cure it under the lamp.
- Apply a thin layer of the top coat from the Glam Nail Gel Polish Kit over all the nails to seal in the design and add shine. Cure it under the lamp.
- Use a nail cleanser to remove any sticky residue from your nails.
3. Pink Nude-Based Pompon Flowers

Steps:
- Prepare your nails as in step 1 of the first tutorial.
- Apply a thin layer of the nude gel polish as the base color and cure it under the UV or LED lamp.
- Apply a second coat of the nude gel polish for full coverage and cure it again.
- Apply the pink gel polish to create the pompon flower designs on each nail with the help of nail art brush. Cure it under the lamp.
- Apply a thin layer of the top coat from the Glam Nail Gel Polish Kit over all the nails to seal in the decorations and add shine. Cure it under the lamp.
- Use a nail cleanser to remove any sticky residue from your nails.
4. Dark Pink-Based Cherry Printed Nails

Steps:
- Prepare your nails as in step 1 of the first tutorial.
- Apply a thin layer of the dark pink gel polish as the base color and cure it under the UV or LED lamp.
- Apply a second coat of the dark pink gel polish for full coverage and cure it again.
- Choose red and green gel polishes and make cherry design on nails with the help of nail art brush.
- Cure under the lamp.
- Apply a thin layer of the top coat from the Glam Nail Gel Polish Kit over all the nails to seal in the design and add shine. Cure it under the lamp.
- Use a nail cleanser to remove any sticky residue from your nails.
5. Sky Blue-Based Cloud Design Nails

Steps:
- Prepare your nails as in step 1 of the first tutorial.
- Apply a thin layer of the sky blue gel polish as the base color and cure it under the UV or LED lamp.
- Apply a second coat of the sky blue gel polish for full coverage and cure it again.
- Use White Gel Polish and create cloud nail art designs and cure it.
- Apply a thin layer of the top coat from the Glam Nail Gel Polish Kit over all the nails to seal in the design and add shine. Cure it under the lamp.
- Use a nail cleanser to remove any sticky residue from your nails.
With these step-by-step instructions and Glam Nail Products, you can create stunning DIY gel nail art designs right at home. Enjoy your beautiful and creative manicures!
 Gel Effect Nail Polish